
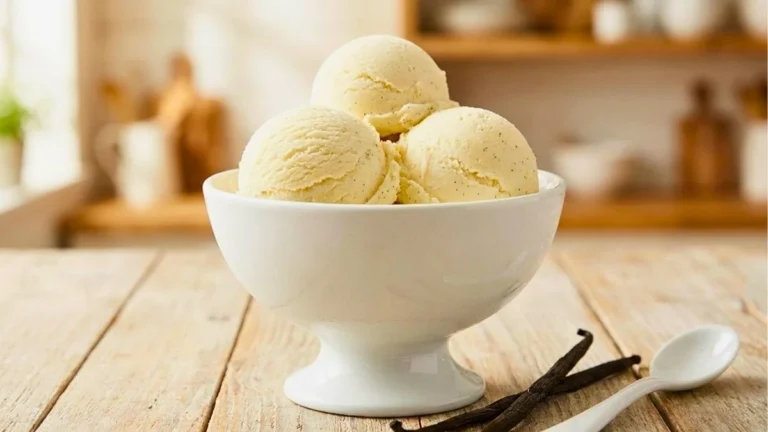

There’s something deeply satisfying about pulling a batch of homemade ice cream from your own freezer, especially when it tastes better than anything from the store.
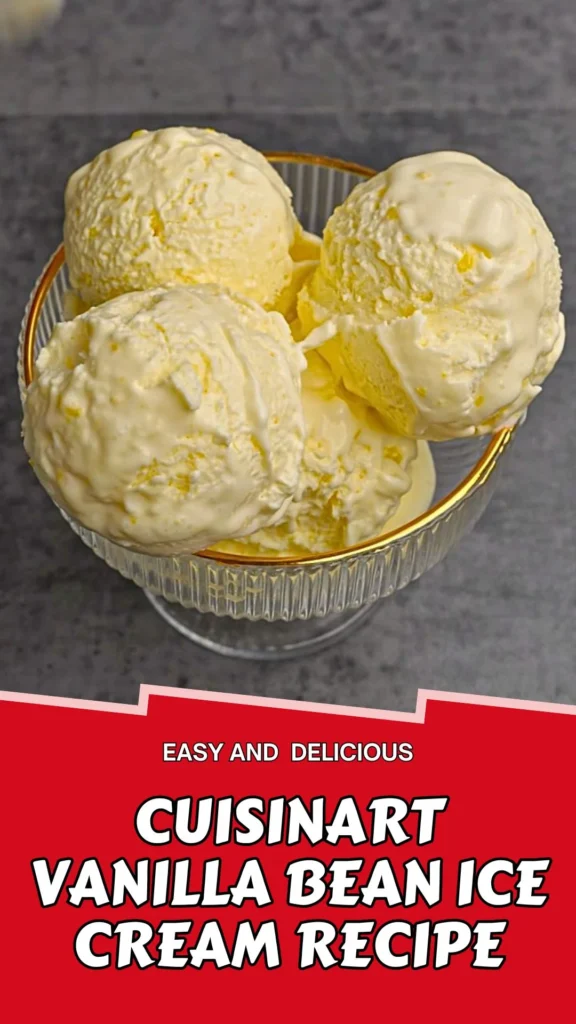
This Cuisinart vanilla bean ice cream recipe delivers a rich, custard-style base studded with real vanilla bean flecks and a silky texture that only a proper churn can achieve.
Made with egg yolks, heavy cream, and whole milk, this Cuisinart vanilla ice cream recipe with eggs produces a dense, French-style scoop that tastes like it came from a small-batch creamery.
Whether you’re new to using a Cuisinart ice cream maker or a seasoned home churner, this recipe walks you through every step so your vanilla bean ice cream turns out smooth, creamy, and full of flavor every time.
Why You’ll Love Cuisinart Vanilla Bean Ice Cream Recipe
This vanilla bean ice cream recipe Cuisinart turns simple pantry staples into a dessert that tastes like it belongs in a specialty shop. Here’s why it deserves a permanent spot in your recipe rotation:
- Made with real vanilla beans for authentic, deep flavor
- Custard base creates an ultra-creamy, dense texture
- No stabilizers or artificial thickeners needed
- Perfect balance of sweetness without being overly sugary
- Works flawlessly with any Cuisinart ice cream maker model
- Simple ingredients you likely already have on hand
- Freezes into a smooth, scoopable consistency
- Great base for endless mix-in variations
- Impresses guests with a homemade, gourmet touch
- Tastes noticeably richer than store-bought vanilla ice cream
What Does Cuisinart Vanilla Bean Ice Cream Taste Like?
This vanilla bean ice cream is rich, velvety, and unmistakably creamy, with a texture that coats the spoon rather than melting away instantly. The egg yolk custard base gives it a dense, almost buttery mouthfeel that’s noticeably heavier than lighter, egg-free versions.

Real vanilla bean specks deliver a warm, floral sweetness that’s more complex and fragrant than extract alone can offer. Each bite carries a subtle caramelized note from the slowly cooked custard, balanced by a clean, milky finish.
The aroma alone, warm vanilla with a faint hint of toasted cream, makes this one of those recipes that fills the kitchen with comfort before you’ve even taken a bite. It’s smooth without being icy, sweet without being cloying, and satisfying in a way that feels genuinely homemade.
Why This Cuisinart Vanilla Bean Ice Cream Recipe Works
This recipe uses an egg-yolk custard to create a richer, fuller-bodied vanilla ice cream than many egg-free recipes. The yolks help emulsify the milk and cream, while the sugar contributes sweetness and affects how firmly the mixture freezes. Real vanilla beans add aromatic flavor and the characteristic dark flecks throughout the finished ice cream.
The key is controlling the temperature of the custard and chilling the base thoroughly before churning. Heating too aggressively can cause the egg yolks to curdle, while starting with a warm base can make it harder for the freezer bowl to freeze the mixture efficiently.
For the smoothest result, strain the cooked custard, cool it promptly, and refrigerate it until completely cold. Churn according to your Cuisinart model’s instructions, then freeze the ice cream until it reaches your preferred firmness.
Cuisinart Vanilla Bean Ice Cream Recipe Ingredients
Gather all the following ingredients, before you start making this cuisinart vanilla ice cream.
For the Custard Base
- 2 cups heavy cream
- 1 cup whole milk
- ¾ cup granulated sugar, divided
- 5 large egg yolks
- 2 vanilla beans
- ¼ teaspoon salt
Kitchen Tools/Utensils List
- Cuisinart ice cream maker (with pre-frozen freezer bowl)
- Medium saucepan
- Mixing bowls
- Whisk
- Rubber spatula
- Fine-mesh sieve/strainer
- Instant-read or candy thermometer
- Large bowl for ice bath
- Freezer-safe storage container
Preparation and Cooking Time
Preparation Time: 20 minutes
Cooking Time: 15 minutes
Chilling Time: 4 hours (overnight recommended)
Churning Time: 20–25 minutes
Total Time: Approximately 5 hours (plus overnight chilling for best results)
Servings: 8 servings (about 1 quart)
Difficulty: Intermediate
How to Make Cuisinart Vanilla Bean Ice Cream
Follow these steps in order, and take your time with the custard stage, since a slow, steady process is the secret to smooth, creamy homemade ice cream.
1. Heat the Milk and Cream
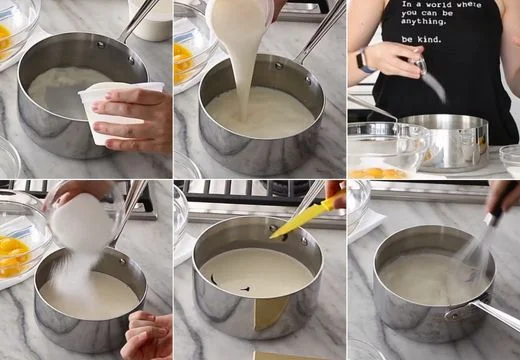
Add the heavy cream, whole milk, salt, and about half of the sugar to a saucepan. Add the split vanilla beans and scrape the seeds from the pods into the mixture. Heat over medium heat, whisking occasionally, until the mixture is steaming and just begins to bubble.
2. Whisk the Egg Yolks
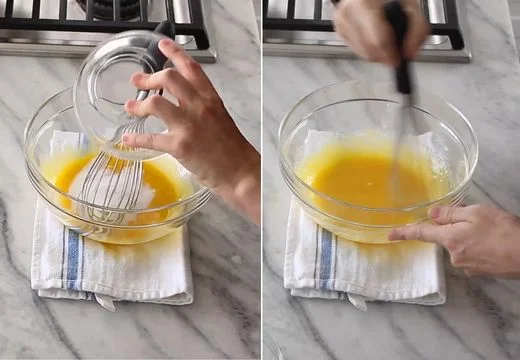
While the cream mixture heats, place the egg yolks in a bowl. Whisk them until smooth, then gradually whisk in the remaining sugar until the yolks become pale and slightly fluffy.
3. Temper the Eggs
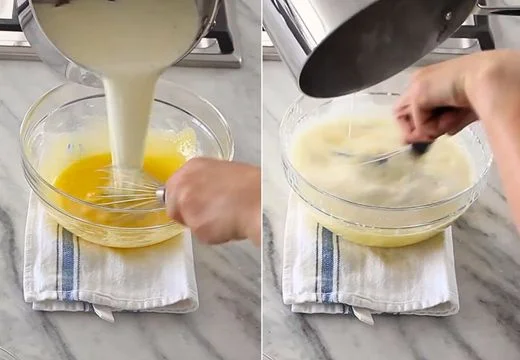
Slowly pour a small amount of the hot cream mixture into the egg yolks while whisking constantly. Continue adding the hot mixture gradually until everything is combined. This gently raises the temperature of the eggs and prevents them from scrambling.
4. Cook the Ice Cream Base
Pour the mixture back into the saucepan. Cook over medium-low heat, stirring constantly with a spatula, until the custard thickens slightly and reaches about 180–185°F (82–85°C). Do not let it boil.

5. Strain and Chill
Pour the custard through a fine-mesh sieve into a clean bowl to remove the vanilla pods and any bits of cooked egg. Place the bowl in an ice bath and let it cool, then refrigerate until the base is completely cold, preferably overnight.
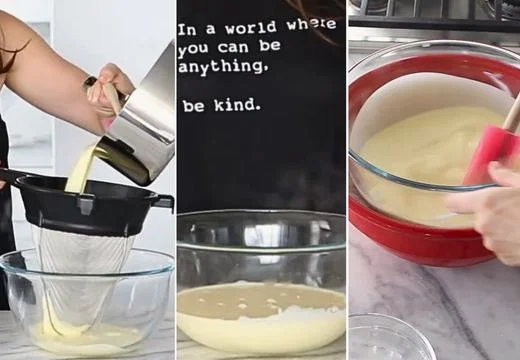
6. Churn in the Cuisinart Ice Cream Maker
Make sure the Cuisinart freezer bowl is thoroughly frozen according to the manufacturer’s instructions. Assemble the machine, turn it on, and pour in the chilled vanilla base. Let it churn until thick, airy, and scoopable, usually following your machine’s recommended churning time.
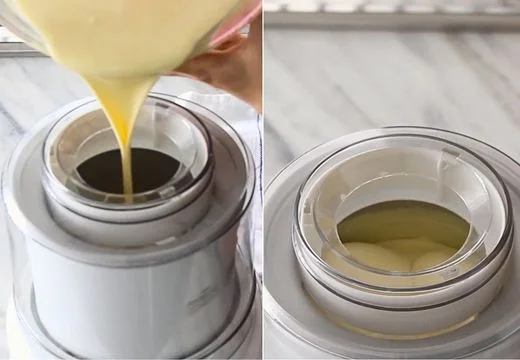
7. Freeze Until Firm
Transfer the freshly churned ice cream to a freezer-safe container and freeze overnight, or until firm.
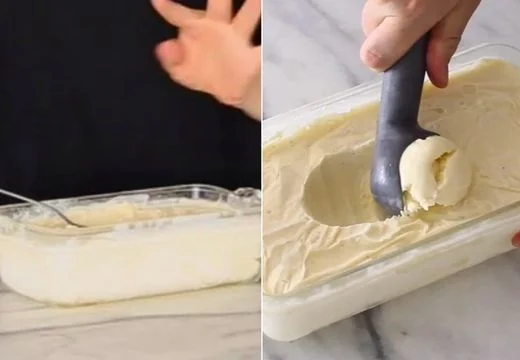
For easier scooping, let it sit at room temperature for 5–7 minutes before serving.
How to Get the Best Results With a Cuisinart Ice Cream Maker
Freeze the bowl completely. If your machine uses a removable freezer bowl, follow the manufacturer’s freezing instructions. Many models require the bowl to be frozen for approximately 16–24 hours, but the exact requirement depends on the model and storage conditions.
Start with a thoroughly chilled base. Refrigerate the custard until cold throughout. A warm mixture can slow freezing and produce a softer result.
Start the machine before pouring. For models whose instructions specify this procedure, turn on the machine before adding the base. Pour slowly through the ingredient opening and avoid exceeding the recommended fill level.
Watch the texture rather than the clock alone. The ice cream is generally ready to transfer when it resembles thick soft serve. Churning time varies with the machine, base temperature, room conditions, and bowl performance.
Allow time for hardening. Freshly churned ice cream is usually softer than commercial ice cream. Transfer it to a shallow, freezer-safe container and freeze until firm before serving.
How to Tell When the Vanilla Custard Is Ready
Cook the custard gently while stirring continuously, paying attention to both temperature and texture. It should become slightly thicker and coat the back of a spoon. When you draw a finger through the coating, the line should remain visible briefly.
An instant-read thermometer helps you monitor the temperature, but avoid letting the mixture boil. If you see small egg-like lumps developing, remove the pan from the heat immediately and strain the custard. Straining can remove minor lumps, although it cannot fully repair a badly curdled custard.
Cool the finished mixture promptly in an ice bath, taking care to prevent water from entering the bowl, then refrigerate it until completely cold before churning.
Expert Tips for Smooth, Creamy Vanilla Bean Ice Cream
A few careful techniques make the difference between good ice cream and truly exceptional homemade vanilla bean ice cream. Follow these expert tips for perfect results every time:
Freeze the bowl completely. A freezer bowl that has not reached its required temperature may fail to freeze the custard properly. Follow the instructions for your exact Cuisinart model.
Chill the custard thoroughly. Overnight chilling is convenient and helps the base enter the machine cold.
Control the heat carefully. Gentle, continuous stirring helps prevent egg yolks from curdling and keeps the custard from scorching on the bottom of the pan.
Strain the mixture. A fine-mesh strainer catches vanilla pods and minor lumps, producing a smoother base.
Avoid overfilling the machine. Follow the capacity stated in your manual. The mixture needs room to expand as it churns.
Stop at the right texture. The ice cream should resemble thick soft serve before transferring it to the freezer. Extended churning is not a substitute for adequate bowl freezing.

Protect the ice cream in storage. Use an airtight, freezer-safe container and minimize air exposure to help prevent ice crystals and freezer odors.
Vanilla Ice Cream Ingredient Substitutions
Can I use vanilla extract instead of vanilla beans?
Yes. Pure vanilla extract is a convenient alternative if vanilla beans are unavailable. For this batch, start with 2 teaspoons of pure vanilla extract, then adjust based on your preferred flavor. Add it after cooking the custard so its aroma is not unnecessarily exposed to prolonged heat. The finished ice cream will not have the same natural vanilla flecks.
Can I use vanilla bean paste?
Yes. Vanilla bean paste can provide a similar appearance and a concentrated vanilla flavor. Use the amount recommended on the product label as a starting point, since paste concentration varies by brand.
Can I use half-and-half instead of heavy cream?
You can, but the finished ice cream will generally be less rich and may have a different texture. This recipe is designed around the higher fat content of heavy cream, so substitutions may require testing.
Can I make this recipe without eggs?
Yes, but removing the egg yolks changes the recipe into an egg-free style of ice cream. The texture and flavor will differ, and the dairy-to-sugar balance may need to be adjusted. For the closest result to this recipe’s intended French-style custard, keep the egg yolks.
Troubleshooting Cuisinart Vanilla Bean Ice Cream
Why is my ice cream not freezing in the Cuisinart?
The freezer bowl may not be cold enough, the custard may not be fully chilled, or the machine may be operating outside its intended conditions. Verify the bowl’s preparation instructions, chill the base completely, and avoid filling beyond the recommended capacity.
Why is my ice cream too soft after churning?
Freshly churned ice cream is normally softer than fully frozen ice cream. Transfer it to a freezer-safe container and freeze until firm. If it remains unusually soft, check your freezer temperature and the machine’s performance.
Why did my custard curdle?
The egg yolks may have overheated or cooked unevenly. Temper the yolks gradually, maintain gentle heat, and stir continuously. Straining may remove minor lumps, but severely curdled custard may not recover its original smoothness.
Why is my homemade vanilla ice cream icy?
Ice crystals can develop when the base is insufficiently chilled before churning, the mixture freezes too slowly, or the ice cream experiences repeated temperature changes during storage. Chill the custard thoroughly, use a properly prepared freezer bowl, and store the finished ice cream in a well-sealed container.
Why is my ice cream too hard to scoop?
Homemade ice cream can freeze quite firmly because it lacks some of the stabilizers and formulation adjustments used in commercial products. Let it soften briefly at room temperature before scooping. Avoid repeatedly thawing and refreezing the entire container.
What’s the Difference Between Vanilla Ice Cream and Vanilla Bean Ice Cream?
The main difference between vanilla ice cream and vanilla bean ice cream is the source of the vanilla flavor and the appearance of the finished dessert. Regular vanilla ice cream is often flavored with pure vanilla extract, while vanilla bean ice cream uses the tiny seeds scraped from real vanilla pods to create a more distinctive appearance and aromatic flavor.
Vanilla ice cream has a smooth, uniform appearance and a familiar sweet vanilla flavor. Depending on the recipe, it may be made with vanilla extract, vanilla paste, or vanilla beans.
Vanilla bean ice cream contains visible dark flecks from the vanilla seeds. These seeds contribute a fragrant, complex vanilla aroma that many people enjoy in premium homemade ice cream. Using whole vanilla beans also allows the pods to infuse the cream and milk as the custard heats.
For this Cuisinart vanilla bean ice cream recipe, real vanilla beans complement the rich egg-yolk custard, heavy cream, and whole milk. The result is a creamy French-style ice cream with natural vanilla flecks and a deep, aromatic flavor.
Can you use vanilla extract instead of vanilla beans? Yes. Pure vanilla extract works well as a substitute, although the ice cream will not have the characteristic flecks of real vanilla seeds. Add the extract after cooking the custard to preserve more of its delicate aroma.
Ultimately, both versions can taste delicious. If you prefer a classic, straightforward vanilla flavor, extract-based ice cream is an excellent choice. If you want a more aromatic dessert with the traditional appearance of premium vanilla bean ice cream, using real vanilla beans is worth the extra effort.
Vanilla Bean Ice Cream Flavor Variations and Serving Ideas
Once you’ve mastered this vanilla bean base, you can adapt it to a range of desserts.
-
Chocolate chip vanilla: Fold in finely chopped chocolate during the final stage of churning, following your machine’s instructions.
-
Caramel swirl: Layer chilled caramel sauce through the finished ice cream as you transfer it to the storage container.
-
Berry vanilla: Add small amounts of prepared, chilled berries or a thick berry ripple to avoid introducing excessive moisture.
-
Toasted pecan: Mix in cooled, toasted pecans after churning.
-
Vanilla affogato: Serve a scoop in a cup and pour a shot of hot espresso over it.
-
Ice cream sandwiches: Place a scoop between two cookies and freeze briefly to help the sandwich hold its shape.
-
Apple pie topping: Serve alongside warm apple pie or fruit cobbler.
For mix-ins, keep additions reasonably small and cool any cooked ingredients before incorporating them.
More Cuisinart Ice Cream Maker Recipes to Try
If you enjoyed this recipe, try these other delicious homemade frozen treats made with a Cuisinart ice cream maker:
- Cuisinart Ice Cream Maker Raspberry Sorbet Recipe – A bright, fruity sorbet that’s perfect for a refreshing summer dessert.
- Cuisinart Watermelon Sorbet Recipe – A light and refreshing watermelon treat that’s especially delicious on hot days.
- Cuisinart Lemon Sorbet Recipe – A sweet and tangy lemon sorbet with a fresh citrus flavor.
- Cuisinart Peach Ice Cream Recipe – A creamy homemade ice cream packed with the sweet flavor of ripe peaches.
Storage & Reheating Guidance
Store the ice cream in an airtight, freezer-safe container for up to 2 weeks for the best texture and flavor. Press plastic wrap against the surface before sealing to minimize ice crystals. Let it sit at room temperature for 5–7 minutes before scooping. This ice cream isn’t reheated; simply soften slightly for easier serving.
Cuisinart Vanilla Bean Ice Cream Nutrition Information
Per serving (approximate, based on 8 servings):
- Calories: 290
- Total Fat: 22g
- Saturated Fat: 13g
- Cholesterol: 195mg
- Sodium: 75mg
- Total Carbohydrates: 19g
- Sugars: 18g
- Protein: 4g
Nutritional values are estimates and may vary based on specific ingredients and portion sizes used.
Cuisinart Vanilla Bean Ice Cream Recipe
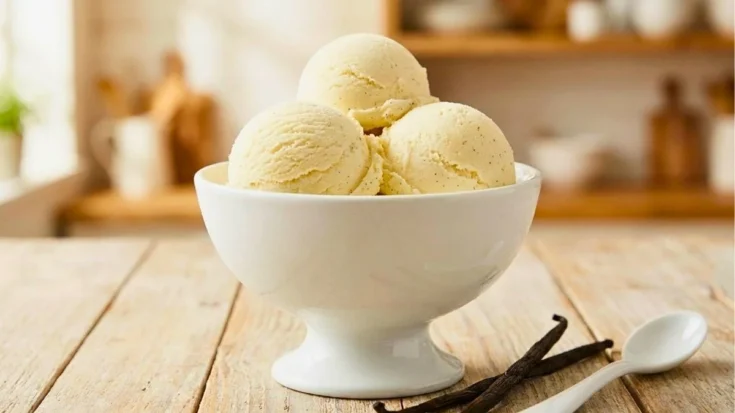
There’s something deeply satisfying about pulling a batch of homemade ice cream from your own freezer, especially when it tastes better than anything from the store. This Cuisinart vanilla bean ice cream recipe delivers a rich, custard-style base studded with real vanilla bean flecks and a silky texture that only a proper churn can achieve.
Ingredients
- 2 cups heavy cream
- 1 cup whole milk
- ¾ cup granulated sugar
- 5 large egg yolks
- 2 vanilla beans
- ¼ teaspoon salt
Instructions
1. Heat the Milk and Cream
Add the heavy cream, whole milk, salt, and about half of the sugar to a saucepan. Add the split vanilla beans and scrape the seeds from the pods into the mixture. Heat over medium heat, whisking occasionally, until the mixture is steaming and just begins to bubble.
2. Whisk the Egg Yolks
While the cream mixture heats, place the egg yolks in a bowl. Whisk them until smooth, then gradually whisk in the remaining sugar until the yolks become pale and slightly fluffy.
3. Temper the Eggs
Slowly pour a small amount of the hot cream mixture into the egg yolks while whisking constantly. Continue adding the hot mixture gradually until everything is combined. This gently raises the temperature of the eggs and prevents them from scrambling.
4. Cook the Ice Cream Base
Pour the mixture back into the saucepan. Cook over medium-low heat, stirring constantly with a spatula, until the custard thickens slightly and reaches about 180–185°F (82–85°C). Do not let it boil.
5. Strain and Chill
Pour the custard through a fine-mesh sieve into a clean bowl to remove the vanilla pods and any bits of cooked egg. Place the bowl in an ice bath and let it cool, then refrigerate until the base is completely cold, preferably overnight.
6. Churn in the Cuisinart Ice Cream Maker
Make sure the Cuisinart freezer bowl is thoroughly frozen according to the manufacturer’s instructions. Assemble the machine, turn it on, and pour in the chilled vanilla base. Let it churn until thick, airy, and scoopable, usually following your machine’s recommended churning time.
7. Freeze Until Firm
Transfer the freshly churned ice cream to a freezer-safe container and freeze overnight, or until firm. For easier scooping, let it sit at room temperature for 5–7 minutes before serving.
Notes
Store the ice cream in an airtight, freezer-safe container for up to 2 weeks for the best texture and flavor. Press plastic wrap against the surface before sealing to minimize ice crystals. Let it sit at room temperature for 5–7 minutes before scooping. This ice cream isn’t reheated; simply soften slightly for easier serving.
Nutrition Information:
Yield:
8Serving Size:
1Amount Per Serving: Calories: 290
Common Queries and FAQs About Cuisinart Vanilla Bean Ice Cream Recipe
When you give this cuisinart ice cream maker vanilla bean recipe a try, you might have a few questions. Don’t worry-we’ve rounded up answers to the most common ones to help you out.
1. Can I make this Cuisinart vanilla bean ice cream recipe without eggs?
Yes, though the texture will be lighter and less custard-like. Removing the eggs creates a Philadelphia-style ice cream instead of the richer French-style version this recipe uses.
2. How long does it take to churn ice cream in a Cuisinart machine?
Most Cuisinart models churn ice cream to a soft-serve consistency in about 20 to 25 minutes, though this can vary slightly by model.
3. Why is my ice cream base not thickening in the freezer bowl?
This usually happens when the freezer bowl wasn’t frozen long enough. It needs a full 16 to 24 hours in the freezer to reach the proper temperature for churning.
4. Can I substitute vanilla extract for vanilla beans?
Yes, you can use about 2 tablespoons of pure vanilla extract in place of the beans, stirred in after cooking, though the flavor will be slightly less complex.
5. Why did my custard base turn out grainy or curdled?
Graininess typically results from cooking the eggs too quickly or at too high a temperature. Tempering slowly and cooking over medium-low heat helps prevent this.
6. How do I know when the ice cream base is fully cooked?
The custard is ready when it coats the back of a spoon and reaches 180–185°F. It should thicken slightly but never come to a full boil.
7. Can I double this vanilla ice cream recipe?
Most standard Cuisinart freezer bowls have a capacity limit, so doubling the recipe usually requires churning in two separate batches for the best texture.
8. How long does homemade vanilla bean ice cream last in the freezer?
For the best flavor and texture, homemade ice cream is best enjoyed within 2 weeks, though it remains safe to eat for up to a month if stored properly.
Making vanilla bean ice cream at home with your Cuisinart machine is easier than it looks, and the payoff is a rich, custard-style dessert far superior to anything store-bought. With real vanilla beans, a properly cooked egg yolk base, and a few simple techniques, you’ll end up with a creamy, scoopable treat perfect for any occasion.
Try this recipe once, and it may just become your go-to vanilla base for countless flavor variations. Grab your ingredients, freeze that bowl, and get churning.
We’d love to hear how this recipe turns out for you! Give it a try, then drop a comment below to share your thoughts and tips with us. You can also follow us on Pinterest, and YouTube for more delicious updates and kitchen inspiration. Your feedback and support mean the world to us!