
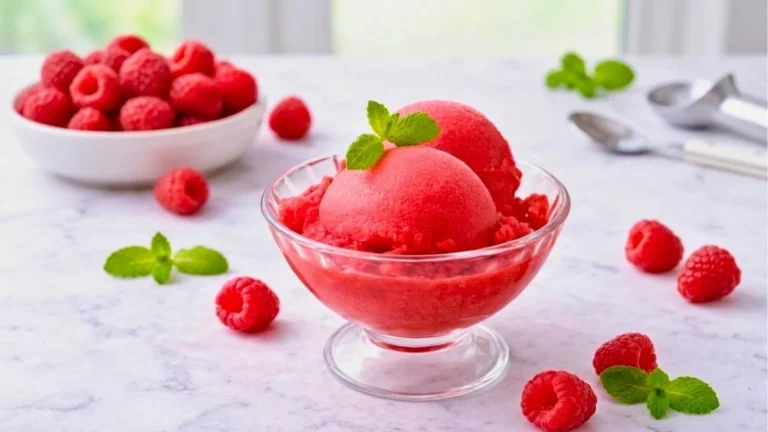

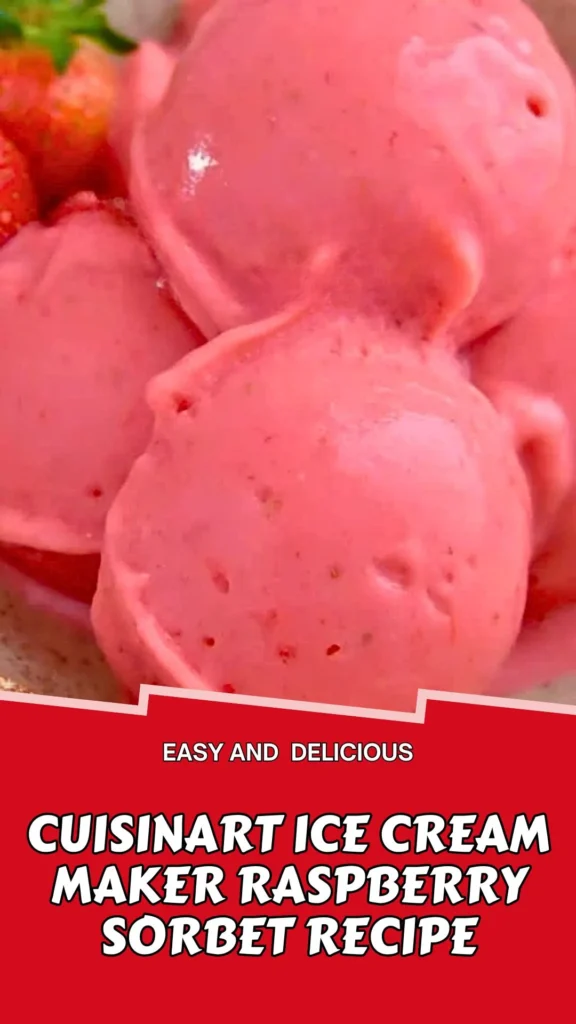
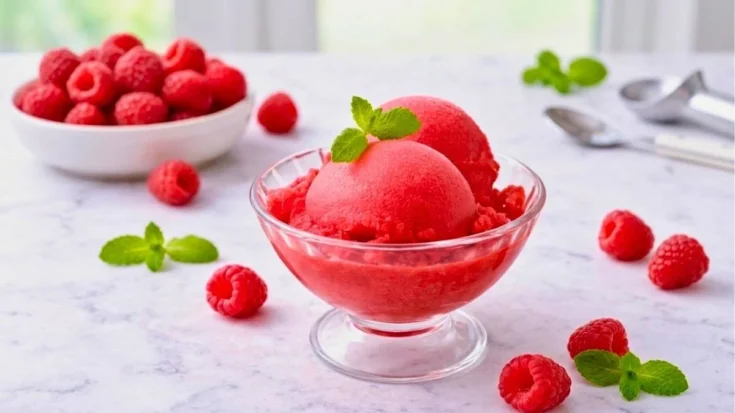
Nothing captures the taste of summer quite like a scoop of homemade raspberry sorbet made in a Cuisinart ice cream maker.
This cuisinart ice cream maker raspberry sorbet recipe transforms fresh or frozen raspberries into a silky, vibrant dessert with just four simple ingredients and no eggs or dairy required.
The natural tartness of the berries balances beautifully with sugar and a touch of vanilla, creating a refreshing treat that tastes far better than anything store-bought.
Whether you’re cooling off on a hot afternoon or looking for a light dessert to finish a dinner party, this sorbet delivers bold berry flavor in every bite.
Best of all, your Cuisinart does most of the work, turning a chilled raspberry mixture into a creamy, scoopable dessert in under an hour.
What Is Cuisinart Ice Cream Maker Raspberry Sorbet?
Cuisinart ice cream maker raspberry sorbet is a refreshing frozen dessert made by blending raspberries with sugar and other simple ingredients. Unlike traditional ice cream, it contains no cream, milk, or eggs, allowing the bright, naturally tart raspberry flavor to shine.
The chilled raspberry mixture is poured into a frozen Cuisinart ice cream maker bowl and churned until thick and smooth. The machine helps create a lighter, more consistent texture than simply freezing the mixture.
This homemade sorbet can be prepared with fresh or frozen raspberries, making it an easy year-round dessert for summer gatherings, dinner parties, or everyday treats.
Why You’ll Love This Raspberry Sorbet
This sorbet is proof that a handful of quality ingredients can produce restaurant-worthy results at home.
- Only four ingredients needed, no fancy shopping list
- Naturally dairy-free and egg-free dessert option
- Ready to churn in under 30 minutes of prep
- Bright, tangy raspberry flavor in every spoonful
- Works with fresh or frozen raspberries year-round
- No-machine method included for flexibility
- Smooth, creamy texture without any cream
- Perfect make-ahead dessert for entertaining guests
- Naturally vegan and gluten-free friendly
- Easy to double for larger gatherings
What Does Cuisinart Ice Cream Maker Raspberry Sorbet Taste Like?
This raspberry sorbet tastes like biting into sun-ripened berries at their peak, sweet, tart, and intensely fruity all at once. The texture is smooth and velvety, with none of the iciness you might expect from a fruit-based frozen dessert.
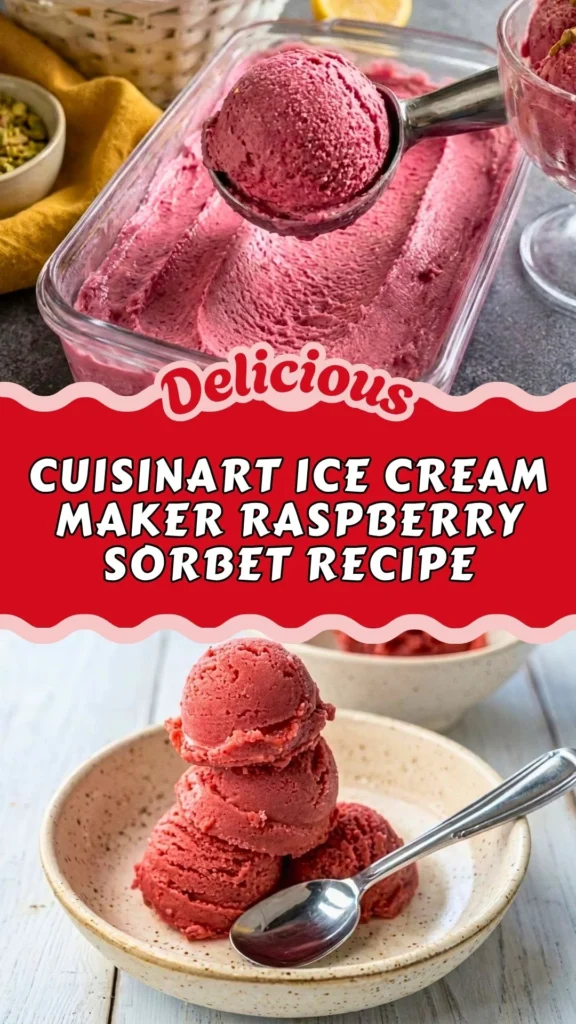
Liquid glucose gives it a soft, scoopable consistency that holds its shape without turning rock-hard in the freezer. A whisper of vanilla rounds out the sharp raspberry edge, adding warmth without masking the fruit’s natural brightness.
The aroma alone, fresh, floral, and slightly tangy, is enough to make your mouth water before the first bite. Each spoonful melts quickly on the tongue, leaving a clean, refreshing finish that never feels heavy or overly sweet.
Cuisinart Ice Cream Maker Raspberry Sorbet Recipe Ingredients
Gather all the following ingredients, before you start making this Cuisinart Ice Cream Maker Raspberry Sorbet.
For the raspberry base:
- 750 g fresh or frozen raspberries
- 150 g caster sugar
- 2 tablespoons liquid glucose
- ½ teaspoon pure vanilla extract
Why These Ingredients Matter
Raspberries: Fresh raspberries work especially well when they are ripe and flavorful. Frozen raspberries are convenient and allow you to make sorbet throughout the year.
Caster sugar: Sugar provides sweetness while also helping control the texture of the frozen sorbet.
Water: Water forms the base of the syrup and helps create the correct consistency.
Liquid glucose: Glucose helps reduce excessive ice-crystal formation and can make homemade sorbet softer and easier to scoop.
Vanilla: A small amount of vanilla rounds out the sharp raspberry flavor without hiding the fruit.
Salt: Just a small pinch enhances the raspberry flavor.
Kitchen Tools/Utensils List
- Food processor or blender
- Fine-mesh sieve
- Large mixing bowl
- Small saucepan
- Wooden spoon or silicone spatula
- Airtight containers (for chilling and freezing)
- Cuisinart ice cream maker with frozen bowl
- Measuring cups and spoons
Preparation and Cooking Time
Preparation Time: 20 minutes
Chilling Time: 1–2 hours
Churning Time: 50 minutes
Freezing Time: 2–4 hours
Total Time: Approximately 4–7 hours (including chilling and freezing)
Servings: 6–8
Difficulty: Easy
Fresh vs. Frozen Raspberries
You can use either fresh or frozen raspberries.
Fresh raspberries
Use fresh berries when they are ripe, fragrant, and naturally sweet. Wash and drain them thoroughly before blending.
Frozen raspberries
Frozen raspberries are convenient and work very well for sorbet. Thaw them completely before blending so the puree can be processed smoothly.
Cuisinart itself uses thawed frozen raspberries in its published raspberry-sorbet recipes, so frozen berries are a practical year-round option.
Do You Need to Remove Raspberry Seeds?
You don’t have to, but straining the purée is strongly recommended if you want a smoother sorbet.
Raspberry seeds can give the finished dessert a slightly gritty texture. After blending, pour the purée through a fine-mesh sieve and press it gently with a spatula or the back of a spoon to extract as much liquid as possible.
For an especially smooth result, strain the purée twice.
Before You Start: Freeze the Cuisinart Bowl
If your Cuisinart machine uses a removable freezer bowl, freeze the bowl according to your model’s instructions before making the sorbet.
Many frozen-bowl models require approximately 16–24 hours in the freezer.
A simple test is to shake the frozen bowl gently. If you can hear liquid moving inside it, it needs more freezing time.
Keep the bowl in the freezer until the raspberry mixture is completely chilled and you are ready to churn.
How to Make Raspberry Sorbet in a Cuisinart Ice Cream Maker
Follow these simple steps in order, and you’ll have smooth, homemade sorbet ready to enjoy with minimal effort.
Step 1: Blend and Strain the Raspberries
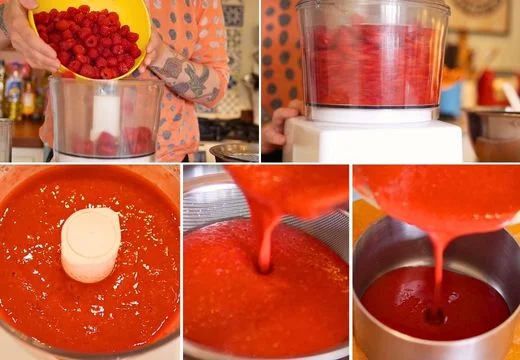
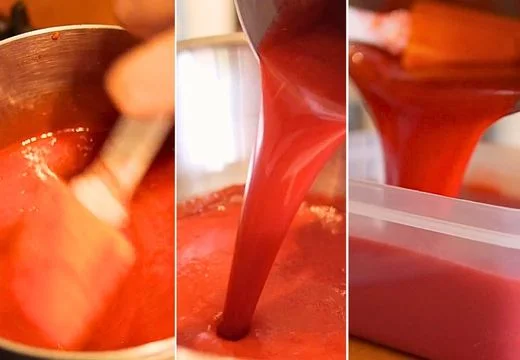
Add the 750 g raspberries to a food processor or blender and blend until completely smooth and liquefied. Pour the puree through a fine-mesh sieve into a large bowl, pressing with the back of a spoon or spatula to extract as much juice as possible while leaving the seeds and pulp behind.
Step 2: Make the Raspberry Syrup
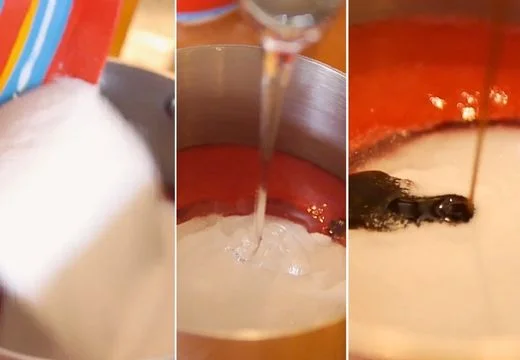
Pour about 1 cup (240 ml) of the strained raspberry puree into a small saucepan. Add the 150 g caster sugar, 2 tablespoons liquid glucose, and ½ teaspoon pure vanilla extract. Place the saucepan over low heat and stir continuously until the sugar has completely dissolved. Do not let the mixture boil.
Step 3: Combine and Chill the Mixture
Pour the warm raspberry syrup back into the remaining strained raspberry puree and stir until everything is fully combined. Transfer the mixture to an airtight container and refrigerate for 1–2 hours, or until thoroughly chilled.
Step 4: Churn the Sorbet
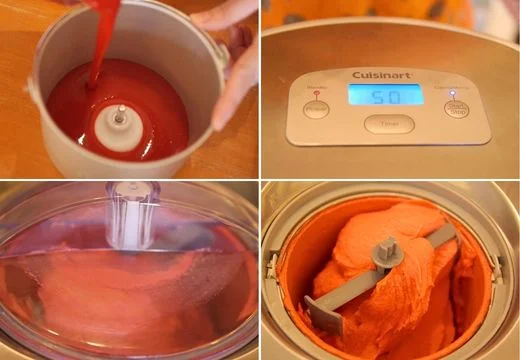
Pour the chilled raspberry mixture into the frozen bowl of your ice cream maker. Churn for about 50 minutes, or according to your manufacturer’s instructions, until it becomes thick, smooth, and creamy.
Step 5: Freeze Until Firm
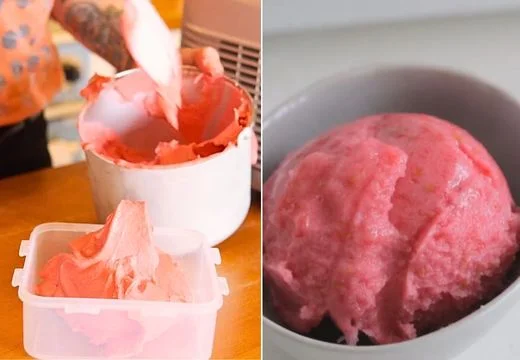
Transfer the freshly churned sorbet to a freezer-safe airtight container. Freeze for 2–4 hours to allow it to firm up for the perfect scoopable texture before serving.
Step 6: Alternative No-Machine Method
If you don’t have an ice cream maker, pour the chilled raspberry mixture into a freezer-safe container. Freeze for 3–4 hours, stirring well with a fork every 30 minutes to break up ice crystals until the sorbet is smooth and evenly frozen.
How Long Does Raspberry Sorbet Take in a Cuisinart?
The churning time depends on your specific Cuisinart model.
As a general guide, many frozen-bowl Cuisinart machines can churn sorbet in approximately 15–25 minutes when the bowl is completely frozen and the raspberry mixture is thoroughly chilled.
The sorbet should be thick and soft-serve-like when it leaves the machine.
Don’t continue churning simply to reach a particular number of minutes if the sorbet has already reached the correct consistency.
How Do You Know When Raspberry Sorbet Is Done Churning?
Look for these signs:
-
The mixture has increased noticeably in thickness.
-
It looks similar to soft serve.
-
The paddle leaves visible ridges in the mixture.
-
The sorbet holds its shape briefly.
-
It is cold and creamy rather than liquid.
The sorbet does not need to be completely firm when it comes out of the machine. Freezing it afterward gives it a firmer scooping texture.
Why Is My Raspberry Sorbet Icy?
Icy sorbet can have several causes.
The mixture wasn’t cold enough
A warm base makes it harder for the machine to freeze the mixture quickly.
Too little sugar
Sugar helps control freezing. A significant reduction can produce a harder texture.
The freezer is very cold
Homemade sorbet can become extremely firm when stored for several hours in a cold home freezer.
Allow it to soften for 10–15 minutes before serving.
The sorbet wasn’t churned effectively
Make sure the freezer bowl was sufficiently frozen and that you followed your Cuisinart model’s operating instructions.
Poor storage
Store sorbet in a tightly sealed freezer-safe container to reduce exposure to air and ice crystals.
Why Is My Sorbet Too Hard?
Homemade sorbet naturally becomes firmer after freezing.
If the sorbet is difficult to scoop, let the container stand at room temperature for approximately 10–15 minutes.
Do not microwave the sorbet.
For the best texture, store it in a shallow, airtight freezer-safe container so that the sorbet is easier to portion and freezes more evenly.
Can I Make This Recipe Without Liquid Glucose?
Yes, but the texture may change.
Liquid glucose helps improve the texture and scoopability of frozen desserts. If you omit it, the sorbet may freeze harder and develop larger ice crystals.
If you don’t have glucose, you can still make the sorbet, but avoid making additional large reductions in the sugar.
Can I Reduce the Sugar?
You can reduce the sugar slightly if your raspberries are particularly sweet, but don’t remove a large amount.
Sugar affects both sweetness and freezing behavior, so significantly reducing it can produce a hard or icy sorbet.
The best approach is to taste the raspberry base before churning and make only a modest adjustment.
Can I Add Lemon Juice?
Yes.
For a sharper raspberry flavor, add 1–2 tablespoons of freshly squeezed lemon juice to the chilled base.
Start with a small amount and taste before adding more.
Lemon juice is especially useful when the raspberries are very sweet and lack acidity.
Customization & Serving Pairing Ideas for Cuisinart Ice Cream Maker Raspberry Sorbet
A raspberry sorbet recipe like this one is easy to adapt to different flavors, occasions, and dietary needs. This recipe is versatile and easy to customize. Here are seven delicious ideas:
1. Add a citrus twist
Stir in a tablespoon of fresh lemon or lime juice before chilling to sharpen the tartness and add a zesty layer of flavor that complements the raspberries beautifully.
2. Mix in fresh mint
Finely chop a few mint leaves and fold them into the puree for a cooling, herbaceous note that pairs wonderfully with summer meals.
3. Swap in mixed berries
Replace a portion of the raspberries with strawberries, blackberries, or blueberries to create a mixed-berry version with a more complex flavor profile.
4. Layer it with yogurt
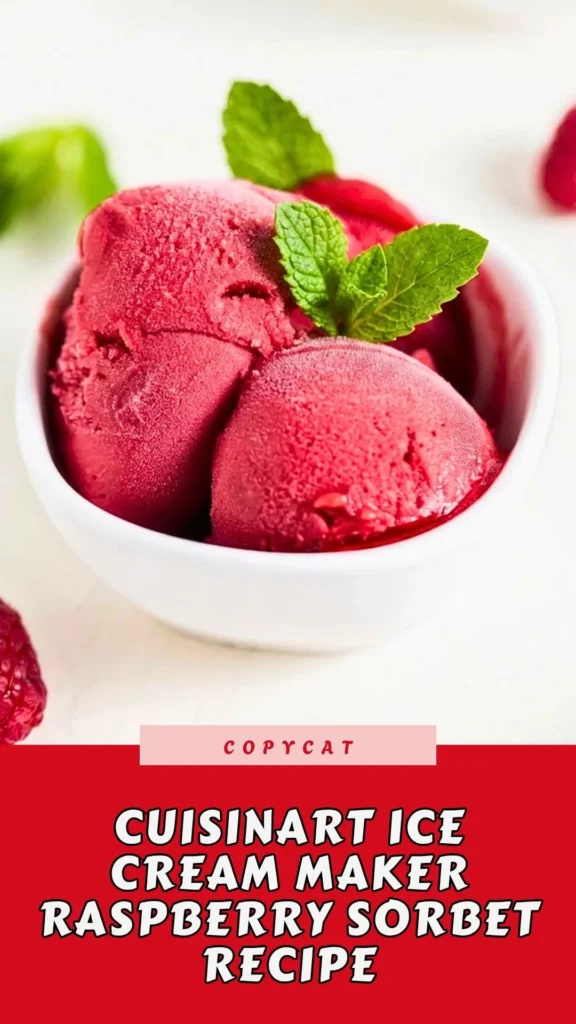
Serve scoops alongside Greek yogurt for a tangy, protein-rich pairing that balances the sorbet’s sweetness with a creamy contrast.
5. Pair with dark chocolate
A few shavings of dark chocolate or a small square on the side introduces a rich, slightly bitter counterpoint to the bright fruit flavor.
6. Turn it into a float
Scoop the sorbet into a glass and top with sparkling water or prosecco for a refreshing, adult-friendly dessert drink.
7. Serve with shortbread or biscotti
A crisp, buttery cookie on the side adds textural contrast and turns a simple scoop into a more complete dessert course.
These ideas make it simple to keep the recipe feeling fresh, whether you’re serving it at a summer barbecue or a formal dinner. Small tweaks like these can completely change the character of the dish without adding much extra effort.
Expert Cooking Tips for Cuisinart Ice Cream Maker Raspberry Sorbet Recipe
Getting silky, scoopable results from your Cuisinart ice cream maker recipes sorbet comes down to a few key techniques. Follow these expert tips for perfect results every time:
1. Chill the mixture thoroughly
A cold base churns faster and produces a smoother texture, so don’t skip the 1–2 hour refrigeration step, even if you’re tempted to rush.
2. Freeze your ice cream maker bowl in advance
Most Cuisinart bowls need at least 16–24 hours in the freezer to reach the proper temperature for effective churning.
3. Don’t skip the straining step
Removing the seeds creates a noticeably smoother, more refined texture that feels closer to a professional dessert.
4. Use liquid glucose for scoopability
This ingredient prevents the sorbet from freezing into a solid block, keeping it soft enough to scoop straight from the freezer.
5. Taste and adjust sweetness before churning
Raspberries vary in tartness depending on ripeness, so taste the chilled mixture and add a touch more sugar if needed.
6. Avoid over-churning
Stop once the mixture reaches a thick, soft-serve consistency; churning too long can introduce excess air and weaken the flavor.
7. Let it rest before serving
If the sorbet has been in the freezer for several hours, let it sit at room temperature for 5–10 minutes before scooping for easier serving.
These small details make a noticeable difference in the final texture and flavor of your sorbet. With a little attention to timing and temperature, you’ll get consistent, professional-quality results every time you make it.
More Delicious Dessert Recipes You’ll Love
If you enjoyed this recipe, here are a few more sweet treats to try. These easy homemade desserts are perfect for family gatherings, holiday celebrations, or satisfying your sweet tooth any day of the week.
- Tropical Smoothie Chia Oatmeal Pudding Recipe – A creamy, healthy breakfast-dessert packed with chia seeds, oats, and tropical fruit flavors.
- Baby Lemon Impossible Pies Recipe – Bite-sized lemon pies with a magically formed crust and a smooth, creamy custard filling.
- Golden Graham S’more Recipe – A quick no-bake dessert featuring Golden Grahams cereal, gooey marshmallows, rich chocolate, and buttery goodness.
Storage & Reheating Guidance
Store leftover sorbet in an airtight, freezer-safe container for up to two weeks. Press a piece of parchment paper directly onto the surface before sealing to help prevent ice crystals from forming. There’s no reheating involved, simply let the sorbet sit at room temperature for a few minutes before scooping if it’s too firm.
Cuisinart Raspberry Sorbet Nutrition Information
Approximate values per serving (based on 8 servings):
- Calories: 110
- Carbohydrates: 28 g
- Sugars: 25 g
- Protein: 1 g
- Fat: 0 g
- Fiber: 3 g
- Sodium: 2 mg
Nutrition values are estimates and may vary based on specific brands and portion sizes used.
Cuisinart Ice Cream Maker Raspberry Sorbet Recipe
Nothing captures the taste of summer quite like a scoop of homemade raspberry sorbet made in a Cuisinart ice cream maker. This cuisinart ice cream maker raspberry sorbet recipe transforms fresh or frozen raspberries into a silky, vibrant dessert with just four simple ingredients and no eggs or dairy required.
Ingredients
- 750 g fresh or frozen raspberries
- 150 g caster sugar
- 2 tablespoons liquid glucose
- ½ teaspoon pure vanilla extract
Instructions
Step 1: Blend and Strain the Raspberries
Add the 750 g raspberries to a food processor or blender and blend until completely smooth and liquefied. Pour the puree through a fine-mesh sieve into a large bowl, pressing with the back of a spoon or spatula to extract as much juice as possible while leaving the seeds and pulp behind.
Step 2: Make the Raspberry Syrup
Pour about 1 cup (240 ml) of the strained raspberry puree into a small saucepan. Add the 150 g caster sugar, 2 tablespoons liquid glucose, and ½ teaspoon pure vanilla extract. Place the saucepan over low heat and stir continuously until the sugar has completely dissolved. Do not let the mixture boil.
Step 3: Combine and Chill the Mixture
Pour the warm raspberry syrup back into the remaining strained raspberry puree and stir until everything is fully combined. Transfer the mixture to an airtight container and refrigerate for 1–2 hours, or until thoroughly chilled.
Step 4: Churn the Sorbet
Pour the chilled raspberry mixture into the frozen bowl of your ice cream maker. Churn for about 50 minutes, or according to your manufacturer’s instructions, until it becomes thick, smooth, and creamy.
Step 5: Freeze Until Firm
Transfer the freshly churned sorbet to a freezer-safe airtight container. Freeze for 2–4 hours to allow it to firm up for the perfect scoopable texture before serving.
Step 6: Alternative No-Machine Method
If you don’t have an ice cream maker, pour the chilled raspberry mixture into a freezer-safe container. Freeze for 3–4 hours, stirring well with a fork every 30 minutes to break up ice crystals until the sorbet is smooth and evenly frozen.
Notes
Store leftover sorbet in an airtight, freezer-safe container for up to two weeks. Press a piece of parchment paper directly onto the surface before sealing to help prevent ice crystals from forming. There’s no reheating involved, simply let the sorbet sit at room temperature for a few minutes before scooping if it’s too firm.
Nutrition Information:
Yield:
8Serving Size:
1Amount Per Serving: Calories: 110
Common Queries and FAQs About Raspberry Sorbet Recipe
When you give this Cuisinart Ice Cream Maker Raspberry Sorbet Recipe a try, you might have a few questions. Don’t worry-we’ve rounded up answers to the most common ones to help you out.
1. Can I make sorbet in a Cuisinart ice cream maker without sugar?
You can reduce the sugar slightly, but some sugar is necessary for proper texture and to prevent the sorbet from freezing too hard.
2. How long does it take to churn sorbet in a Cuisinart ice cream maker?
Churning typically takes about 50 minutes, though this can vary slightly depending on your specific model and the temperature of your mixture.
3. Can I use frozen raspberries instead of fresh?
Yes, frozen raspberries work just as well as fresh ones and are often more convenient, especially outside of peak berry season.
4. Do I need to pre-freeze the Cuisinart bowl?
Yes, the bowl must be fully frozen, typically for 16–24 hours, for the churning process to work properly.
5. Do I need to strain raspberry seeds?
You don’t have to, but straining is recommended for a smoother sorbet. Raspberry seeds can create a slightly gritty texture.
6. Is raspberry sorbet dairy-free?
Yes. This recipe contains no milk, cream, or butter.
7. Is raspberry sorbet vegan?
The recipe is vegan-friendly because it contains no dairy, eggs, or other animal-derived ingredients. Check the label of your glucose or corn syrup if following a strict vegan diet.
8. How long does homemade raspberry sorbet last in the freezer?
Stored properly in an airtight container, it stays fresh for up to two weeks without significant texture loss.
9. Can I make this sorbet without an ice cream maker?
Yes, the hand-freezing method with periodic stirring produces good results, though the texture may be slightly less smooth.
10. Is raspberry sorbet vegan?
Yes, this recipe contains no dairy, eggs, or animal products, making it naturally suitable for a vegan diet.
This raspberry sorbet recipe proves that a handful of simple ingredients can create a dessert that feels both elegant and effortless. With its smooth texture, bold berry flavor, and quick churning time, it’s a treat you’ll want to make again and again.
Whether you follow the machine method or opt for the no-churn alternative, the result is a refreshing, naturally sweet dessert perfect for any occasion. Try it this week, and don’t be surprised if it becomes a regular addition to your dessert rotation.
We’d love to hear how this recipe turns out for you! Give it a try, then drop a comment below to share your thoughts and tips with us. You can also follow us on Pinterest, and YouTube for more delicious updates and kitchen inspiration. Your feedback and support mean the world to us!